Saturday, June 30, 2012

Tour de Fleece 2012 kickoff!

Here's a little montage of the fiber I'll be working with this year for the TdF.

It's more fiber than I think I can finish, but it's all there for a reason. The batts at the top are my current work in progress. The blue fiber next to it is part of a breed study spin along for July/August-- it's Rambouillet. The blue batt is for spinning on my kick spindle, and the blue tussah silk is my randomly drawn spindle/fiber pairing for July.

Clearly I'm in a Blue Period?

I'm also trying out blogging from my phone, so bear with me as I figure out the capabilities of this shiny device.

Who else is vying for the yellow jersey this year?

Wednesday, June 27, 2012

Bad at goodbyes

Isn't everyone bad at goodbyes? Well, I've been saying a lot of them in the past week. I type this surrounded by boxes, as the movers come today, and tomorrow I fly away from New York, and the next time I come back I'll be a visitor and not a New Yorker. I don't know when that's going to really sink in, because it certainly hasn't yet. For the next six months I'll be traveling, and in my head I'm guessing New York will still feel like my home base. It's all so weird I can't quite process it. But I'm incredibly excited for the future, once I can get over the stress of the actual moving part.

Saying goodbyes is not without fun, though. Last weekend, I went on a road trip with many knitter friends to Northampton, MA, home of WEBS, a truly magnificent yarn store. We had two cars worth of people going, and I was in the car that was running earlier, so to stall for time, we went to the Pez factory. It was serendipitous that the moment we discovered we were ahead of the other car, we saw the sign for the factory. So we went!

pez

Untitled

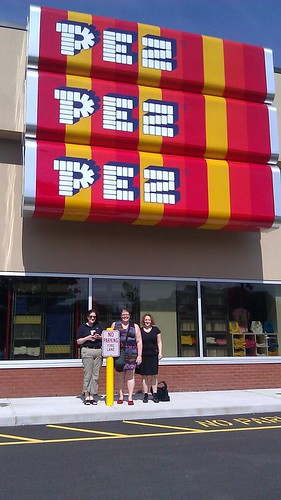
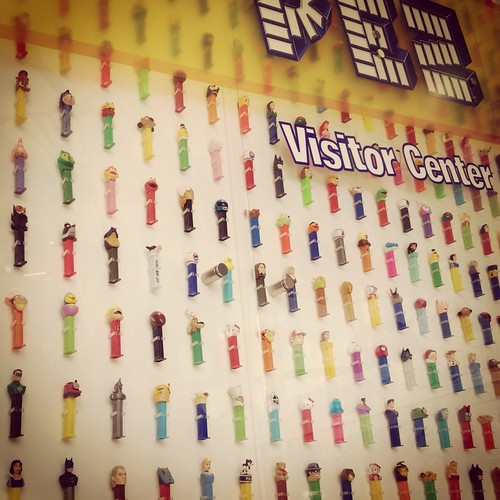
We opted not to pay the $5 for the self guided tour, and we mostly just stuck to the retail area, sneaking peeks over into the museum/factory area that was in direct view. The retail area was amazingly entertaining all on its own.

Untitled

Then we made it to Webs (after a delicious lunch at Paul and Elizabeth's) and we shopped!

webs

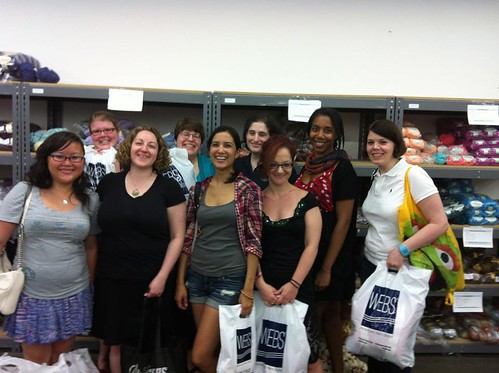
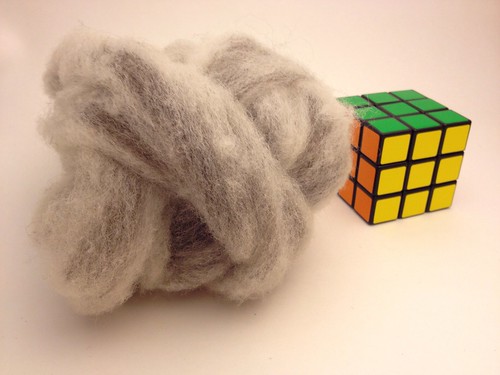
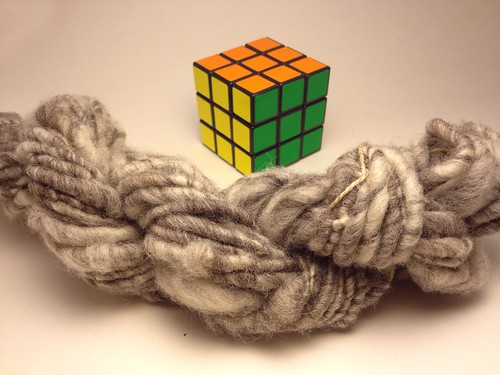
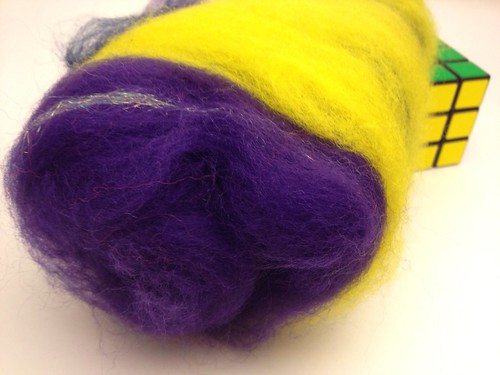
This photo was taken in the warehouse half of the store, where you can get all the super deals. Given that I'm trying not to spend money or acquire things at the moment, I practiced some self-restraint and only bought one item, some spinning fiber.

Untitled

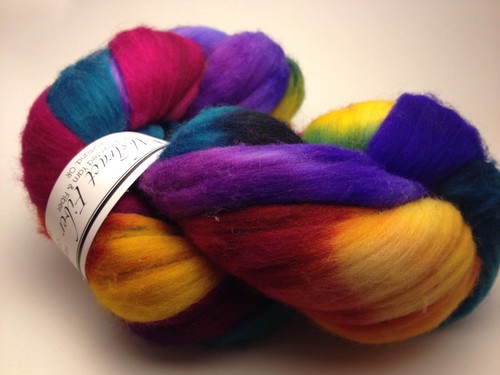
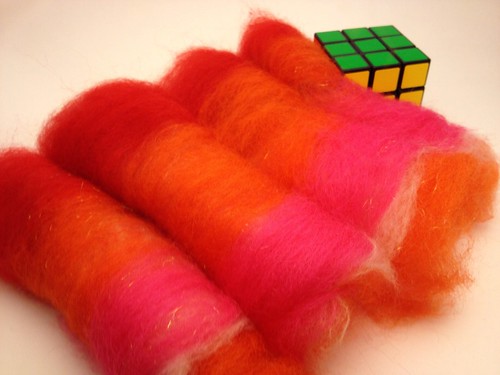
This is Targhee fiber from Abstract Fiber. I love Targhee--it's so puffy!--and I love Abstract Fiber--such rich color! It's been packed and it'll be a fun present to my future self, rewarding me for diligently unpacking all the boxes, since it ended up someplace pretty weird.

I also had a fantastic goodbye dinner at Tio Pepe with another group of knitter friends. (Apologies to Jenny Jo about her absence from this photo; it's a long story, but she knows what I mean.)

tio

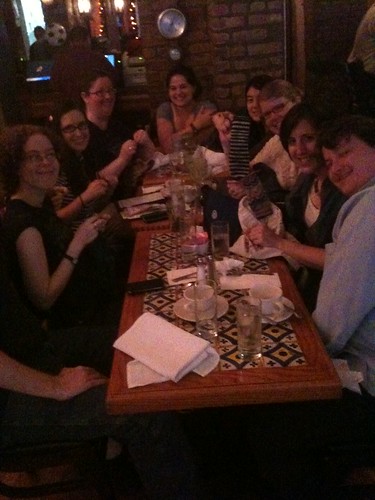
Check out my super gothy stripey sock in the middle of the photo there! I knew none of the people in these photos before I moved to New York three years ago. Now, I consider all of them dear friends. All because of knitting! If you are a solo knitter/crocheter reading this, and you feel like meeting some new people, check out a group local to you. I didn't click with the first group I went to in New York, but then I found two that I adore. I am sad to be leaving these groups, needless to say. I will carry their big hearts in my heart as I travel.

Then we will reunite at Rhinebeck!

Saturday, June 23, 2012

A Puzzling Kitten


Despite the promise of our header, I'm not sure we've ever had a puzzle!  (Aside from our about page, that is).  So here's a couple brain teasers for you.

1.  What kind of fabric do you get when you knit a patchwork of diamonds in knits and purls?  Ya know, like this (empty squares are knit, dotted squares are purled):


Well now, you might think "if you knit this, you would get a patchwork of diamonds" and you'd be right.  What I'm really asking about is the texture of the fabric, and here's what made this puzzling to me: purl stitches that are next to knit stitches get pushed down (like in ribbing), but purl stitches that above or below knit stitches get pushed up (a la garter stitch).  So what happens when you change between knitting and purling along a diagonal?
.
.
.
.
.
.
.
.
.
.
.
.
.
.
.
.
.
.
.


2.  How do you knit this fabric?  It's like popcorn stitch on steroids, with high peaks and low sinks (dips? pits?  Is there a better word for these local minima?)


.
.
.
.
.
.
.
.
.
.
.
.
.
.
.
.
.
.
.


Well, as you may have guessed: the answer to 1 is 2!  It seems that the purl stitches at the skinny points in the tiers of purl diamonds have upward forces on them from the above and below knit stitches, and no counteracting downward forces, so they become peaks.  Meanwhile, the knit stitches at the skinny points in tiers of knit diamonds have only downward forces on them and become sinks.  


I really like the waffley effect of this, and I'm hoping a light blocking doesn't smush it too much.

Sunday, June 17, 2012

A documentation of failure

So here's the thing about tatting: it's all the same simple knot, but it matters which string wraps around which.

I'm hoping that you made friendship bracelets at some point in your life--truly, I hope you still are; friendship bracelets are awesome--and that at some point in your friendship bracelet tenure you made the "Chinese Staircase," seen here

prepster friendship bracelet
(photo by mamichan)

The knot used in this bracelet is similar to one as used in tatting, but in tatting you kind of reverse the handedness of the knot every other time to keep the knots from spiraling around the way they do in the bracelet, and then you add in loops and other fancy things. But what you can imagine is that in the bracelet, there's a clear distinction between which string is forming the knots on the outside, and which strings form the core of the bracelet. This distinction is just as important in tatting, but it's WAY HARDER because there's just one string as the core.

How much harder you say? Check this out:

Untitled

Each of those loops is a failed attempt at tatting. Looks to me like about seven failures before that last beautiful perfect loop. I showed this to my husband and he said, "I'm so glad there isn't such a clear documentation of failure for all the things I've ever tried." What finally made the difference for me was watching the youtube videos by Tatted Treasures. I watched many videos, but these finally connected with me at the level I needed, so check them out if you're tat-curious!

I had enough success that I made a butterfly:

Untitled

Now I'm encouraged. I have this kooky idea of making weird tatted motifs to tack onto t-shirts and skirt hems. It's an extremely portable new craft, so it'll be a good thing to work on during the next few nomadic months of my life. My big goals are a dragon (that links to a .pdf) and a praying mantis, so stay tuned! Tatting is also a potential use of handspun silk thread that's either too thin for my knitting tastes or a little sparse yardage-wise. Anyone else acquiring new hobbies?

Friday, June 15, 2012

Finishing School, Or, I Heart My Personal Protective Equipment

I've embarked on the second stage of finishing my no-longer-brand-new Jensen spinning wheel.  When I first got it, I sanded everything, then applied a coat of pure tung oil diluted with orange solvent (both from Real Milk Paint Co, which seems to be only place that sells uncut tung oil.) 
Today, about 6 months later, I decided it was finally time to go to the next round, which involves a brisk rubdown with 000 steel wool before applying another coat of oil.  Let me tell you some stuff I have learned in this process.  I hope this information will be helpful to you, dear reader, if you ever decide to embark on oil-finishing your own spinning wheel.
  • Orange oil solvent, although naturally derived and "generally recognized as safe", is not exactly non-toxic.  The fumes smell wonderful, but they will totally give you a headache.  Use in a well-ventilated area.  Discard rags outside.  (As a side note, this stuff works great for getting that polymerized cooking grease off of your tea kettle and stovetop...but I digress.) Honestly, I think it might have been just as good to buy the hardware-store tung oil, which is cut with mineral spirits; I diluted the tung oil anyway, and I'm not sure I gained anything by going the granola route with the orange solvent, since it is flammable and has toxic vapors, just like the petroleum-based version. 
  • Tung oil is a hardening oil.  This means that if you leave it on the brush, it will harden the brush.  In case you can't tell, I need a new brush.
  • Sanding generates dust.  Sanding with steel wool generates EXCITING steel wool dust!  The steel wool package says to use gloves and protective eyewear.  Uh, what about my lungs, dude?  I strongly recommend a dust mask or respirator.  A decent respirator is not too expensive and, bonus, you can use it for mixing dye powders later on.  Seriously, the steel wool dust really freaked me out.  I vacuumed my hands, my clothes, and the surrounding area before taking the respirator off.  (And needless to say, I did this outdoors.)  In hindsight, it would have been good to wear an apron.  (Oh, and in case it's not obvious, you should also wear a dust mask when sanding with regular sandpaper.  It's not fun to inhale tiny bits of wood, even if it is lovely solid cherry wood crafted by a master artisan.)
  • Dude, there is a LOT of surface area on a spinning wheel, especially when you include the lazy kate, bobbins, whorls, and distaff.  My general method was to take all the removable parts off of the wheel (flyer, tension screw and block, treadles, footmen), and then to work through sanding all those loose bits in one sitting.  Then in a second sitting, I will sand the wheel.  Then in a third sitting, apply a coat of oil to the parts, then yet another sitting to apply a coat of oil to the wheel.  There are a lot of sittings. 
  • The steel-wool rubdown, though tedious and slightly scary, is really quite gratifying.  It smooths out raised wood-grain and knocks away any bits of dust that settled in the first coat of finish.  Wood that was looking sort of dried-out and neglected after my six months of...er...neglect, now looks satiny-smooth and delightful!  Can't wait to get the oil on.
Sorry about the text-heavy post!  I promise pictures next time.

Monday, June 11, 2012

Finding inspiration in the oddest of places

Picture warning! If a catalog-type photo of a lady in her undies might get you in trouble at work, save this post to read later! Otherwise, read on!

One of my self-determined spinning goals for this month was to try core spinning. Jenny Jo had told me about her core spinning class, I'd been seeing lots of cool art yarn on Ravelry, and I was curious. Youtube sure is great when curiosity strikes (we'll talk about the tatting rabbithole I fell down another time). I watched a series of videos by JazzTurtle Creations, and they seemed plenty straightforward. I grabbed for some deep spinning stash, some Jacob roving I'm guessing came from Meridian Jacobs, from the time I went to the farm to see their baby sheep.

Untitled
I'm not entirely sure this was the best fiber for the job, but I made yarn!

Untitled
My spinning wheel (a Majacraft Little Gem) is definitely fit for spinning superbulky things like this. It's part of the reason I bought my particular wheel-- "you could spin Barbie doll heads into your yarn with this delta orifice," I'd always say when telling folks about my wheel-- and it was about time I actually tested its limits a bit. Mostly I just had to be unafraid of cranking up the tension and taking the spinning very slowly. Verdict? It was fun! I wanted to practice some more! As it turned out, I got to mess around with my friend Cleo's drum carder the other day, and here's where the odd inspiration comes in.

If you are a woman, you may have been told by a certain type of evangelical woman that you are in all likelihood wearing the wrong size bra. I had heard this and ignored it for years. I don't have the dreaded boob muffin top! The middle part of my bras rest on my chest! However, my bras were really on their last legs, so I decided I might as well give it a go at a shop that specializes in fittings. And indeed, like many women find out, I had been wearing a too-large band and a too-small cup. I bought an arsenal of new underthings, but I let one get away. Moreover, the woman at the store, who told me she's now my personal lady-in-waiting, also told me this bra was a "fashion item" and it won't be available forever. It makes sense that bras have seasonal lines like regular fashion does; it had just never occurred to me that that was the case. I just blew my underwear budget for the foreseeable future, so I may just have to let that one go to the universe. But it's a pink bra with orange flowers!


It was right after the bra fitting experience (note: not for the modest, that experience!) that I got to play with the drum carder. What came out? A batt I like to call "fashion item."

Untitled
I also made this other one, with the idea it was an outer space/starry night kind of thing.

Untitled
Then I made more yarn!
Untitled
Untitled
These little things have just 10-12 yards each, and they are very bulky, so I'm not sure what they're good for. This really is the sticking point with art yarn. I don't want to sound unkind, but most finished objects don't particularly jive with my aesthetic sense, even if the yarn totally does. Who out there has seen beautiful art yarn projects they can point me to for more inspiration?